Quickstart
Use this quickstart to install OpenRAG, and then try some of OpenRAG's core features.
Prerequisites
- Install Python version 3.13.
- Install uv.
- Get an OpenAI API key. This quickstart uses OpenAI for demonstration purposes. For other providers, see the other installation methods.
- For Microsoft Windows, you must use the Windows Subsystem for Linux (WSL). See Install OpenRAG on Windows before proceeding.
Install OpenRAG
This quickstart installs OpenRAG with uvx which automatically installs OpenRAG's dependencies as needed, including Docker or Podman.
-
Create a directory for your OpenRAG installation, and then change to that directory:
mkdir openrag-workspacecd openrag-workspace -
Install OpenRAG and its dependencies with
uvx.uvx --python 3.13 openragYou might be prompted to install certain dependencies if they aren't already present in your environment. The entire process can take a few minutes. If you encounter errors during installation, see Troubleshoot OpenRAG.
-
Once the environment is ready, the OpenRAG terminal session starts, and begins issuing prompts for OpenRAG configuration settings.
-
For the OpenSearch and Langflow Admin password prompts, autogenerate or manually enter passwords.
-
For this quickstart, skip or press N for all remaining configuration prompts to use the default values.
Your OpenRAG configuration and passwords are stored in an OpenRAG
.envfile file that is created automatically at~/.openrag/tui. OpenRAG container definitions are stored in thedocker-composefiles in the same directory. -
At the
Start services now?prompt, press Y to start the OpenRAG services.This process can take some time while OpenRAG pulls and runs the container images. If all services start successfully, the terminal prints a confirmation message:
Services are running. -
If the OpenRAG app doesn't launch automatically, select the Open OpenRAG in browser option to launch the OpenRAG app and start the application onboarding process.
-
For this quickstart, select the OpenAI model provider, enter your OpenAI API key, and then click Complete. Use the default settings for all other model options.
-
Click through the onboarding chat for a brief introduction to OpenRAG, or click Skip overview. You can complete this quickstart without going through the overview. The overview demonstrates some basic functionality that is covered in the next section and in other parts of the OpenRAG documentation.
Load and chat with documents
Use the OpenRAG Chat to explore the documents in your OpenRAG database using natural language queries. Some documents are included by default to get you started, and you can load your own documents.
-
In OpenRAG, click Chat.
-
For this quickstart, ask the agent what documents are available. For example:
What documents are available to you?The agent responds with a summary of OpenRAG's default documents.
-
To verify the agent's response, click Knowledge to view the documents stored in the OpenRAG OpenSearch knowledge base. You can click a document to view the chunks of the document as they are stored in the knowledge base.
-
Click Add Knowledge to add your own documents to your OpenRAG knowledge base.
For this quickstart, use either the File or Folder upload options to load documents from your local machine. Folder uploads an entire directory. The default directory is
~/.openrag/documents.For other ingestion options, see Ingest knowledge.
-
Return to the Chat window, and then ask a question related to the documents that you just uploaded.
If the agent's response doesn't seem to reference your documents correctly, see Troubleshoot chat issues.
Change the language model and chat settings
In OpenRAG, you can change some chat and ingestion settings directly on the Settings page. For full customization capabilities, you can edit the underlying Langflow flows in the OpenRAG's embedded Langflow visual editor.
For this quickstart, try changing the Language Model or Agent Instructions. Editing the flow in Langflow is optional.
-
In OpenRAG, click Settings, and then find the Agent section.
-
To change the active language model or agent instructions, edit those fields directly on the Settings page. Language model changes are saved automatically. To apply new instructions, click Save Agent Instructions.
-
To add a new language model, edit the model provider settings or configure an additional provider on the Settings page, and then select the new model in the Agent section.
infoOn the Settings page, you can add, edit, and remove model providers.
OpenRAG functionality requires at least one language model and one embedding model. If there are no models available, most OpenRAG functionality will fail until you reconfigure one model of each type.
If you remove providers or models that you previously used for chat or ingestion, you might experience errors or unexpected behaviors. For more information, see Best practices for multiple embedding models.
-
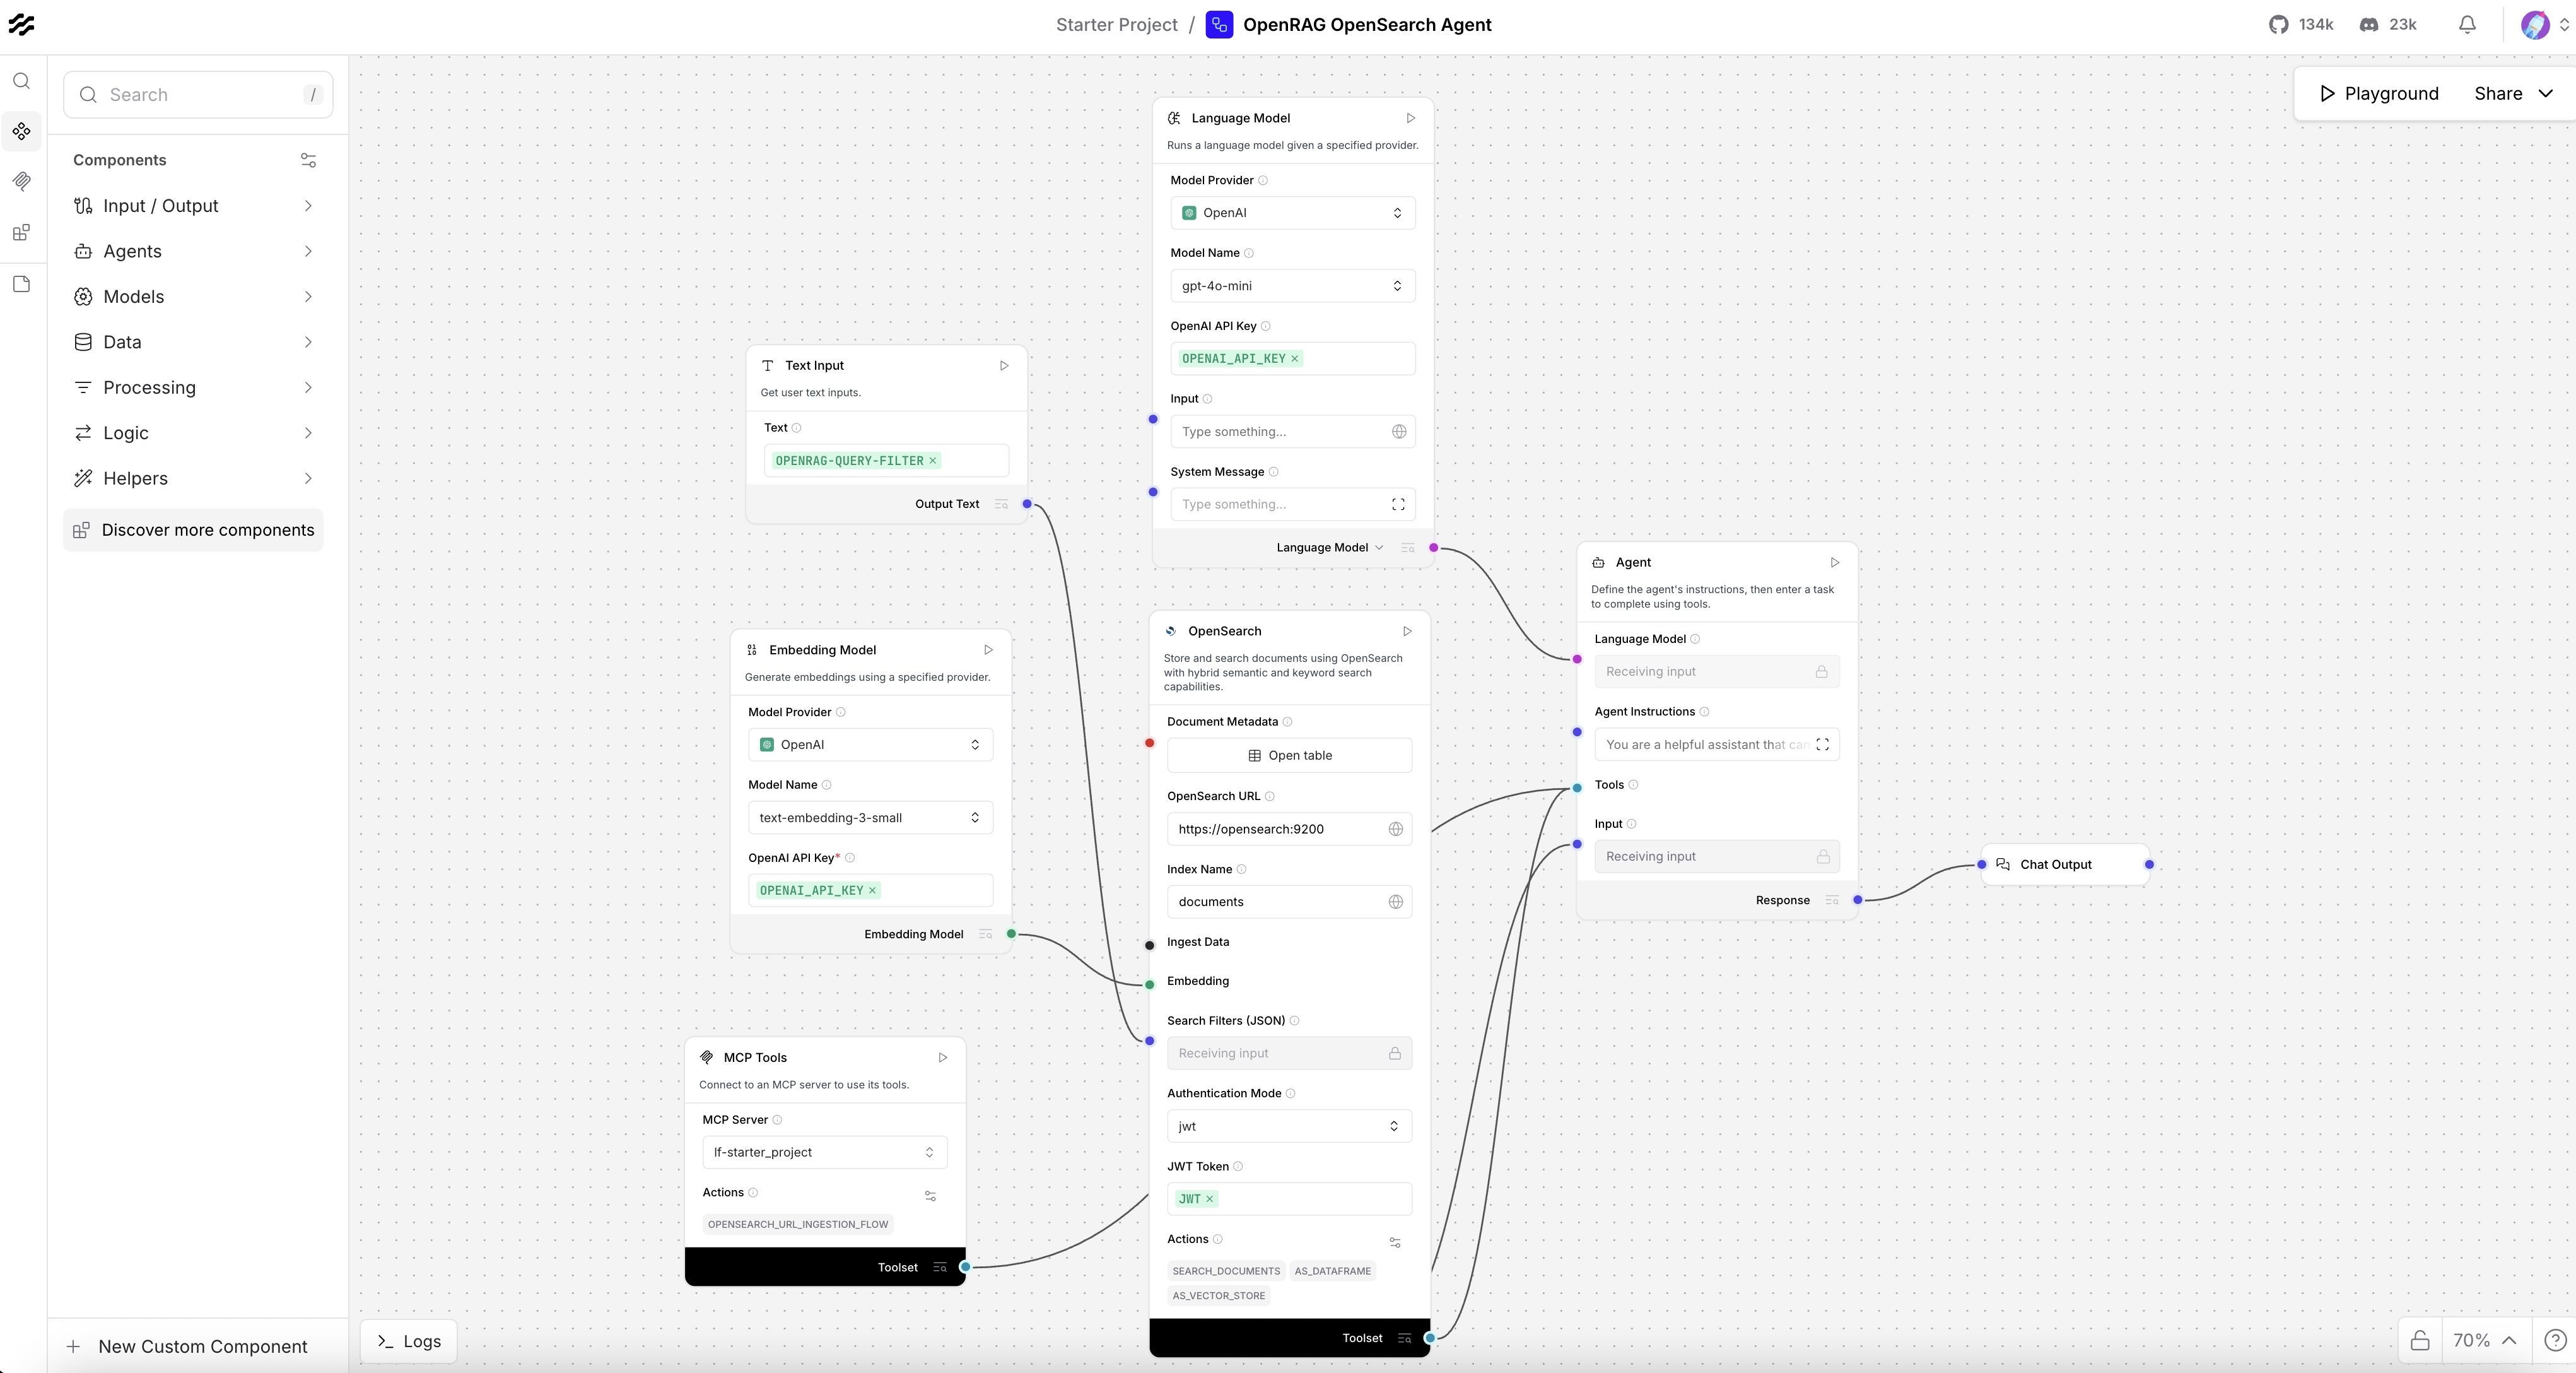
To edit all flow settings and components with full customization capabilities, edit the flow in the Langflow visual editor:
-
Click Edit in Langflow to launch the Langflow visual editor in a new browser tab.
-
If prompted to acknowledge that you are entering Langflow, click Proceed.
-
If Langflow requests login information, enter the
LANGFLOW_SUPERUSERandLANGFLOW_SUPERUSER_PASSWORDfrom your OpenRAG.envfile. -
In the Langflow header, click Starter Project to go to the Langflow Projects page, and then unlock the flow.
-
On the Projects page, click the OpenRAG OpenSearch Agent flow to open the visual editor with the flow unlocked.
-
Modify the flow as desired, and then press Command+S (Ctrl+S) to save your changes. Then, you can close the Langflow browser tab, or leave it open if you want to continue experimenting with the flow editor.
-
-
After you modify any Agent flow settings, go to the OpenRAG Chat, and then click Start new conversation in the Conversations list. This ensures that the chat doesn't persist any context from the previous conversation with the original flow settings.
-
Ask the same question you asked in Load and chat with documents to see how the response differs from the original settings.
-
To undo your changes, go to Settings, and then click Restore flow to revert the flow to its original state when you first installed OpenRAG.
Next steps
-
Reinstall OpenRAG with your preferred settings: This quickstart used
uvxand a minimal setup to demonstrate OpenRAG's core functionality. It is recommended that you reinstall OpenRAG with your preferred configuration and installation method. -
Use the OpenRAG SDKs: To interact with OpenRAG programmatically, use the OpenRAG SDKs.
-
Learn more about OpenRAG: Explore OpenRAG and the OpenRAG documentation to learn more about its features and functionality.
-
Learn more about Langflow: For a deep dive on the Langflow API and visual editor, see the Langflow documentation.